September 25, 2023
How To Use The Fischer: Hands & Feet
Why Use The Fischer for Palmar and Plantar Hyperhidrosis?
Watch the Video Tutorial
Step-by-Step Guide: How to Use The Fischer Iontophoresis Device for Hands & Feet
1: Prepare the Trays and Electrodes
- Place the black silicon-graphite electrodes into the white water bath trays.
- Position the blue pH-balancing foam on top of each electrode.
- Tip: It doesn’t matter which electrode goes in which tray, but for convenience, connect the electrode plugged into E1 to the left tray and E2 to the right tray.
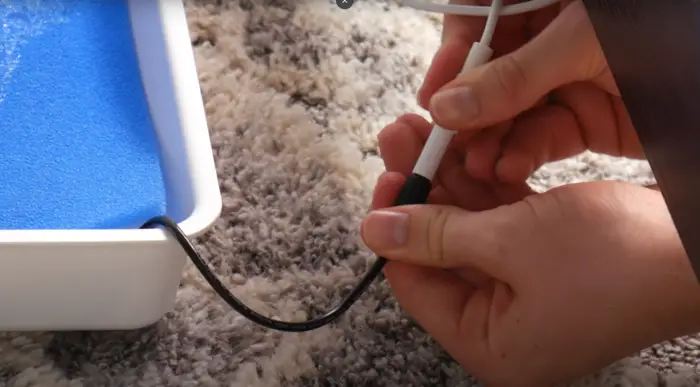
![Close-up photograph with a specific focus on one of the white water bath trays and the black, metal-free silicone electrodes integrated into RA Fischer's 'The Fischer' iontophoresis device; an iontophoresis device designed for the treatment of hyperhidrosis (excessive sweating). The trays feature blue pH-balancing foam and black metal-free silicone electrodes, all presented against a clean white background. [ Iontophoresis Device for Sweating ]](https://www.rafischer.com/wp-content/uploads/2023/09/the-fischer-iontophoresis-machine-hyperhidrosis-sweat-treatment-home-hospital-insurance-fda-approved-ra-fischer-17-scaled.webp)
2: Add Tap Water
- Fill each tray with 2-5 cups of tap water.
- Ensure the foam mats are damp and your palms or soles are wet but not fully submerged.
- Tip: If sweating is concentrated in the palms or soles, avoid covering the outer edges of your hands or feet completely.
3: Connect the Electrodes
- Plug the white electrode cables into the E1 and E2 ports on the back of the control unit.
4: Attach the Cables
- Connect the white electrode cables securely to the black electrode cords.
5: Connect the Power Cord
- Insert the power cord into the main control unit and plug it into a wall outlet.
6: Power On the Device
- Press the power button on the back of the unit to turn on The Fischer.
7: Select Treatment Settings
- Press the SET button on the control unit to activate treatment mode.
- Adjust the power level as needed, ensuring it’s comfortable but effective.
8: Begin the Treatment
- Place your hands or feet in the trays with the foam mats.
- Ensure the mats remain damp throughout the session.
9: Monitor the Active Treatment Display (ATD)
- The ATD will display two bars, indicating the treatment is active. It also shows real-time power levels.
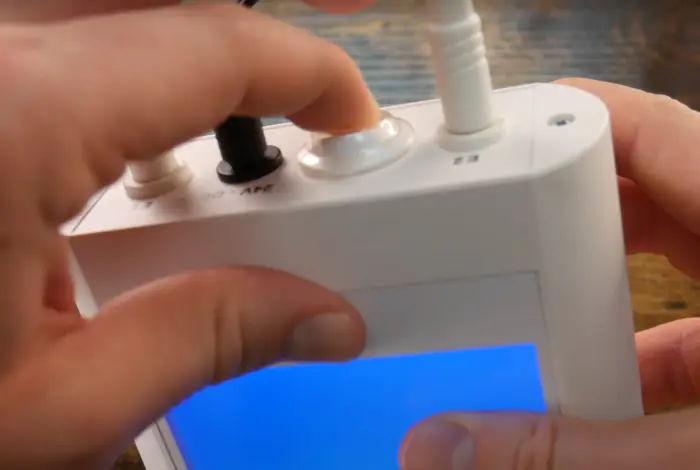
![Photograph showcasing the white, rectangular 'main control unit' of RA Fischer's 'The Fischer' Device—an iontophoresis device designed for the treatment of hyperhidrosis (excessive sweating). The Fischer iontophoresis device is characterized by its white and rectangular shape with a blue and grey screen. On the left side of the device, there is a button labeled 'SET,' while two buttons on the right are represented by arrows. The Fischer device logo is placed in the bottom right corner. It is in between the water bath trays that have the blue ph-balancing foam and metal-free electrodes inside. [ Iontophoresis Device for Sweating ]](https://www.rafischer.com/wp-content/uploads/2023/09/the-fischer-iontophoresis-machine-hyperhidrosis-sweat-treatment-home-hospital-insurance-fda-approved-ra-fischer-1-scaled.webp)
10: Complete the Session
- Allow the treatment to run for 15-20 minutes.
- A beep will signal the end of the session.
- Remove your hands or feet from the trays and turn off the device.
Tips for Effective Iontophoresis Treatments
- Consistency is Key: Start with treatments every other day for the first week. Once sweating reduces, switch to a maintenance schedule (e.g., once every 2-3 weeks).
- Comfort First: Adjust the current settings to a comfortable level. A slight tingling sensation is normal but should not be painful.
- For more tips on managing hyperhidrosis, visit hyperhidrosis sources like the International Hyperhidrosis Society.
THE FISCHER
Reach out today
Contact one of our Treatment Specialists today to answer any and all of your questions about the Fischer.
Managing Excessive Sweating
FAQs: Your Questions Answered
How long does it take to see results with The Fischer?
Many users experience reduced sweating within the first week of treatments with The Fischer iontophoresis device. Full results may take up to three weeks.
Is iontophoresis safe for daily use?
Yes, The Fischer iontophoresis device is FDA-cleared and safe for daily use. Ensure you follow instructions for best results.
Can I use The Fischer if I have sensitive skin?
The Fischer is designed with customizable settings to suit your comfort. Those with sensitive skin can start at a low power level to prevent irritation.
How long should each session last?
Each session with The Fischer should last between 15-20 minutes. Overusing the device won’t improve results and may cause skin irritation.
What makes The Fischer different from other iontophoresis devices?
The Fischer iontophoresis device stands out from other iontophoresis devices due to its advanced technology, durability, and user-friendly design. Here are the key features that set The Fischer apart:
- Silicon-Graphite Electrodes
Unlike traditional devices that use metal electrodes, The Fischer utilizes silicon-graphite electrodes. Dual Current Modes for Customizable Treatment
The Fischer offers both Direct Current (DC) and Pulsed Current (PC) modes, providing customizable comfort and results.Durability and Longevity
The Fischer is a hospital-grade, FDA-cleared device designed for long-term, at-home use. With proper care, it can last 20+ years, far outperforming less durable, lower-quality devices on the market.Enhanced Safety Features
Safety is a top priority with The Fischer. Features such as the Anti-Shock Guard prevent sudden electrical surges, ensuring a safe and comfortable experience throughout your treatment.
Leave a Reply Cancel reply
You must be logged in to post a comment.